Fix-Windows-7

  • Subscribe to our RSS feed.
  • Twitter
  • StumbleUpon
  • Reddit
  • Facebook
  • Digg

Thursday, 23 August 2012

I Can't Print to a Network Printer, What Do I Do?

Posted on 05:29 by Unknown
Network printers are easy to use and share resources, since large network printers typically print much faster than small desktop models. The problem, of course, is that when the network printer is down, no one can print, so knowing how to find and resolve the source of the problem is essential. Follow the given tips to solve the problem.

Step1: First check the network status from Network and Sharing Center option. From this option you can check whether your computer is connected to your network or the Internet, the type of connection, and what level of access you have to other computers and devices on the network.

From Start button -> go to Control Panel-> Network and Internet-> Network and Sharing Center

Can't Print to a Network Printer
Step2: Now try to identify and resolve the home network problems. Right-click on the network icon and open Network Diagnostics and the click Diagnose and repair.

Step3: Try to troubleshoot file and printer sharing.
  • Check the printer status that it is powered on and ready to use. And also check that the computer you are trying to print from is connected to the shared network.  
  • Make sure that each computer that you want to access for printing is in the same workgroup. The name of the workgroup should be exactly the same on every computer. If the printer is plugged in to another computer and shared on the network, make sure that the computer is turned on.
  • If the problem persists, update your printer drivers.

See also: How to Fix a Printer Spooler Error
                How to Fix 'Access Denied' Error when Printing to a Shared Printer


Read More
Posted in i can t print to my wireless printer, network printer | No comments

Tuesday, 14 August 2012

How to Update Printer Drivers Manually

Posted on 03:30 by Unknown
How to Update Printer Drivers Manually
Printer drivers help the printer to understand and execute commands from the PC .Suppose, Windows cannot find a driver for your printer and the printer didn’t come with driver software or the printer is no longer compatible with Windows OS that time you will need to update the printer drivers (see:What to Do When Your Canon Printer Stops Working). Follow the given steps to update printer drivers.

Step1: Find the model number of the printer from manufacturer's website. Then click the link to download the latest driver file to your hard drive.

Step2: Close all the windows and locate the driver file.double-click the file to begin the installation. Follow the below points to update printer drivers.

  • From Start button ->go to Control Panel-> click the System and Security option -> System-> Device Manager.
  • If you're prompted for an administrator password or confirmation, type the password or provide confirmation.
  • In the list of hardware categories, find the printer that you want to update, and then double-click the printer name.
  • Click the Driver tab->Update Driver, and follow the onscreen instructions.
See also: How to Fix Common Printer Installation Errors
                How to Fix 'Access Denied' Error when Printing to a Shared Printer

Read More
Posted in download printer drivers, update printer driver | No comments

Tuesday, 7 August 2012

How to Fix 'Access Denied' Error when Printing to a Shared Printer

Posted on 05:23 by Unknown
The "Access Denied" error can occur when you try to print from a shared printer on your home network. To solve this error in Windows XP system, follow the given steps.

How to Fix 'Access Denied' Error when Printing to a Shared PrinterStep1: Check that the Windows XP computer is properly connected to the home network and set to share printers. You can check the connection from other computer on your network.

Step2: If you are still getting "Access is Denied" error, then try this method. Click the Start button-> go to Control Panel-> click the Printers and other Hardware option.

How to Fix 'Access Denied' Error when Printing to a Shared PrinterStep3: Click Add a printer. It will open Add Printer wizard and click Add a local printer.
Step4: Select Create a new port and check that Local Port is selected or not. Then click Next.

Step5: Type \\computer name\printer name in the Port Name dialog box and then click OK.

Step6: Follow the onscreen instructions and click Finish.

See also: What to Do When Your Printer Goes Down
                 How to Fix a Printer Spooler Error
 
Read More
Posted in access denied to printer, how to fix access denied error | No comments

Monday, 30 July 2012

How to Replace Printer Cartridges

Posted on 05:45 by Unknown
How to Replace Printer Cartridges
Now a printer has on-screen alerts that let you know when the ink/toner level of the cartridge are low. Different print cartridge manufacturers have set out methods to notify you about the levels of the cartridges. When you attempt to print, it appears streaky or blank. This indicates that you need to replace the cartridges. Follow the given steps to replace printer cartridges.

If you want to fix HP printer error, then follow this blog-
How to Fix HP Printer Errors
 
Step1: Check printer cartridge compatibility before unpacking a new print cartridge. Make sure that it is compatible with your printer.

Step2: Press the Power button to turn on the printer.

Step3: Close the printer cartridge and rear doors, if they are not already closed.

Step4: On the product control panel, press the Print Cartridge button . The product rotates the print cartridge carousel.

Step5: Open the printer cartridge door.

Step6: If the cartridge you want to replace is not in the position for removal, close the printer cartridge door, and then press the Print Cartridge button  to rotate the carousel. Otherwise, continue to the next step.

Step7: Grasp the handle on the old print cartridge, and then pull the print cartridge straight out to remove it.

Step8: Close the print cartridge door. After you close the print cartridge door, the control panel displays the 'Initializing ' message. Wait until product is idle and silent before proceeding.

See also: How to Fix a Printer Spooler Error
                What to Do When Your Canon Printer Stops Working
Read More
Posted in printer cartridges, replace printer cartridges | No comments

Wednesday, 25 July 2012

How to Use HP Hardware Diagnostic Tool

Posted on 03:53 by Unknown
HP Diagnostic Tools are designed to automatically diagnose and resolve many hardware problems. These tools include the  "HP Scan Diagnostic Utility" that will help to troubleshoot scanning problems, the "HP Print Diagnostic Utility" that allows to solve printing problems, and the "HP Network Diagnostic Utility" that will help to resolve network issues including wireless network connections with your printer.
You can download and install these free diagnostic tools from the HP website. I’ll discuss about the HP Hardware Diagnostic tool here which fixes some common printer problems listed below.

    How to Use HP Hardware Diagnostic Tool
  • Paper Jam
  • Carriage Stall
  • Original (document feeder) Jam
  • Out of Paper
  • Paper Mismatch
  • Blinking Lights
  • Door Open
  • Print Quality
Follow the simple steps to download and install the hardware diagnostic tool(see:Steps to Install a New HP Printer).

Step1: Download the latest version of Hardware Diagnostic Utility from the HP website. But before downloading, make sure that your system meets the system requirement.

Step2:  When the Security Warning dialog box opens up, select one of two options viz. Run or Save.

Step3: Run the Hardware Diagnostic Utility. You will see a list of installed products on the Hardware Diagnostic Utility screen.

Step4: From the Printer column in the Hardware Diagnostic Utility, select your HP product and click the Diagnose button. The tool will now begin to diagnose your printer and computer for various hardware problems or errors and display the results.

Step5: The results will display either when an error is detected, or when the diagnosis is completed. If errors are detected, then follow the on screen instructions and fix problems. 

Note: If you are facing any problems running the tool, then you can seek online technical support.

See also: Troubleshooting Your HP Printer Problems
                How to Connect My HP Printer to a Computer

Read More
Posted in hardware diagnostics tool, hp diagnostic tools, hp hardware diagnostic tool | No comments

Tuesday, 3 July 2012

How to Make Windows Vista Faster

Posted on 05:39 by Unknown
How to Make Windows Vista Faster
Windows Vista is an operating system that can be heavy on system resources, making your computer run slowly. If your Windows Vista computer is slow, you can improve its functionality in a number of ways and make it run faster(see:Steps to Repair Microsoft Windows Vista). Follow the given steps to make windows vista faster.
If you want to find network setting in Windows Vista,follow this blog-How to find Network Settings in Windows Vista .

Step1: The simplest way to improve performance is to add more memory (RAM) to your system – 1GB (1024MB) is the minimum recommended amount, but add as much memory as you can afford or your system support. Otherwise change the display settings and disable Windows Welcome screen. Follow the given steps to do that.

Step2: Switch your display to Windows Standard from "Start” menu > "Control Panel" > "Appearance and Personalization" > "Personalization" > "Window Color and Appearance". In the Color Scheme menu, click "Windows Standard," then click "OK."

Step3: Disable the Windows Welcome screen. Click "Start" > "Control Panel" > "Classic View" > "Welcome Center" and uncheck the box at the bottom of the window that reads "Run at startup."

Step4: Remove unnecessary programs. Normally new computer often comes loaded with unnecessary programs that have little use or are never used. To check list of the programs, Click "Start" > "Control Panel" > "Programs and Features".

Step5: Disable unused items from the task bar. Right-click an empty space on the taskbar and click "Properties." Click the "Notification Area" tab and click the "Customize" button. Go through the list of programs and select the program which you want to disable.

Step6: Upgrade your drivers as these are used for graphics cards and chipsets – these can lead to better performance.

Step7: Stop auto start application, which makes your system slow.

Step8: Clean unnecessary icons from your desktop.

See also: What to Do When Microsoft Windows Vista Won't Shut Down - Causes and Solutions
                 Microsoft Windows Vista Keeps Restarting Problem - Here Is Your Solution


Read More
Posted in how to make vista faster, make vista faster | No comments

Wednesday, 27 June 2012

How to Format Windows XP

Posted on 05:41 by Unknown
Formatting a hard drive erases all data on the drive, so it is important to back up all your wanted data to an external hard drive before proceeding. If you want to format Windows XP, then you need Windows XP installation CD. Follow the given steps to format Windows XP.
If you want to fix slow start up in Windows XP then follow this blog- How to Fix Windows Xp Slow Startup

Step1: First you must put your Windows XP CD in the drive.

Step2: Then restart your computer. And press Delete key repeatedly on the keyboard.

Step3: When it says press any key to boot from cd, Press any key on the keyboard.
How to Format Windows XP
Step4: Go into the BIOS settings of your PC, Check your motherboard information and enable “Boot from CD” option from your BIOS.

Step5: After you enter the setup, the CD will load up a blue screen and will start loading operating system files (it will take few minutes). When it finishes, it will list a few options, click the option “Press ENTER to set up Windows XP now”.

Step6: Press F8 to accept Microsoft license agreement.

Step7: Press Enter to start the Windows installation.

Step8: Delete old partition and format. At this point you need to select the partition where you prefer to install Windows XP.

Step9: Create installation partition. Select un-partitioned space and press “C”.

Step10: Select format using NTFS (Quick) and hit Enter.

Step11: Setup will start and auto-format the “C:” partition, and start with Windows XP installation. It will reboot the setup and Copy all the files needed for Windows setup.

Step12: wait for few minutes and do not remove the Windows XP CD until the computer has started up with a new desktop and icons.

See also: What to Do When Microsoft Windows XP Won't Shut Down
                How to Scan Windows and Fix Errors 

Read More
Posted in format windows XP | No comments

Thursday, 21 June 2012

How to Register DLL Files in Microsoft Windows XP?

Posted on 05:36 by Unknown
A DLL (Dynamic Link Library) is a grouping of files that include both data and executable codes that are able to be used by one or more programs at the same time. A common task that arises for home computer users is figuring out how to register a DLL to allow the desired computer software to operate properly. If you need to register a DLL due to some sort of corruption or installation failure, you can do it manually. Follow the given steps to re-register a DLL file in windows XP.

How to Register DLL Files in Microsoft Windows XP?Step1: Click the “Start” menu button and go to the “Run” option.

Step2: Type “cmd” into the Run box and press “Enter”. The windows XP Command Prompt will open up.

Step3: Enter regsvr32 “path and FileName.dll” into the Windows XP Command Prompt and press "Enter". The path is the actual location of the DLL file or directory on the computer’s hard or networked drive. Example of this entry is: Regsvr32 “C:WindowsSystem32example.dll”. That’s it! The Dll file has been registered successfully now.

Step4: Type “exit” and press “Enter” to close the windows XP command Prompt.


If you want to fix windows XP slow start up then follow this blog-How to Fix Windows Xp Slow Startup

You can also see: What to Do When Microsoft Windows XP Won't Shut Down
                              How to Recover Deleted Files from Window XP

Read More
Posted in dll files windows xp, how to fix dll file, register dll xp | No comments

Tuesday, 12 June 2012

What to do when Microsoft Windows 7 keeps restarting itself

Posted on 05:35 by Unknown
What to do when Microsoft Windows 7 keeps restarting itself
When a computer keeps rebooting itself, it can happen due to a wide range of problems, like -incompatible software such as Firewall and Antivirus software, damaged or overheating parts inside your computer or even incompatible peripherals such as printers and scanners. If your computer is virus infected, that time your system would tell you that there is no operating system found or you may get blue Screen of death(see also: how to prevent blue screen death).

Follow the given steps to fix your windows 7 problems.

Step1: When you turn on your computer, make sure that the fan in running in the very beginning. If your computer is virus infected, that time your fan will continue running without displaying anything on the screen.

Step2: Run a complete system virus scan and malware scan to check for any viruses or malware presented in your system.
Step3: The other reason your computer might be turning off is because it is overheating. The CPU is not getting a lot of air flow. Place a cooling fan nearby your computer.

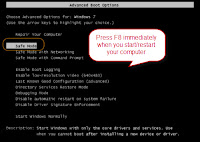
Step4: Try to run your operating system in safe mode. Remove CDs or DVDs (if it is inside) from your computer, and then restart your computer. And press F8 key repeatedly and Use the Down arrow key to choose the option Safe mode and press the Enter key.

Step5: When your computer is in safe mode, you'll see the words Safe Mode in the corners of the display. To exit safe mode, restart your computer without pressing the F8 key.

Step6: Sometimes Windows 7 keeps restarting due to the errors in Windows registry. Clean Windows registry and prevent windows 7 problems.

See also:How to Resolve Windows 7 BOOTMGR Missing Error

Read More
Posted in microsoft windows 7 help, windows 7 help | No comments

Thursday, 7 June 2012

How to Reset a Password in Windows 7 Safe Mode

Posted on 04:53 by Unknown
By running your computer in safe mode, non-essential processes do not start and non-core components are disabled. This basic mode allows you to troubleshoot computer problems and gain access if you have forgotten the password of a user account. To reset Windows 7 password in safe mode, an accessible administrator account is required. Follow the given steps to reset password in windows 7 safe mode.

Reset a Password in Windows 7 Safe ModeStep1: Restart or power on your computer, and immediately repeatedly press the F8 key.

Step2: In the Windows Advanced Options Menu screen, use the Down arrow key to select Safe Mode and press Enter. Booting in safe mode may take little longer than booting in normal mode.

Step3: Select a user account with administrator permissions that you can log on with its password.

Step4: When your system finishes booting, open the Local Users and Groups Window by clicking Start button and inputting “lusrmgr.msc “into the Start Search box.

Step5: In the Local Users and Groups Window, expand Local Users and Groups, and then expand Users.

Step6: Right-click the account that you need to reset the password for, and then click Set Password. Type and confirm the new password.

Step7: Restart your computer. You’ll be able to log in to the target user account with the newly created password.

Tip: If you are unable to reset password in safe mode, you can get technical support .To get windows 7 support, you can reach  online technical support service desk from V tech-squad at their Toll Free No +1-877-452-9201.

See also:How to Create a Login & Password for Windows 7

Read More
Posted in reset password windows 7, windows 7 safe mode password reset | No comments

Tuesday, 29 May 2012

How to Connect a Dell Printer to a Wireless System

Posted on 06:12 by Unknown
Wireless network is the best option to share your resources on multiple computers in your home. With a wireless network in place, you can share files between your laptop and desktop, play music from one PC to another. You can also print from anywhere in your house with a Dell wireless-enabled printer. Follow the given instruction to connect a dell printer to a wireless system.

Step1: Open the top of the printer and install the ink cartridges. Make sure you remove the small pieces of tape from the bottom of each ink cartridge before snapping the cartridges into place.

Step2: Place the Dell wireless printer on a flat surface, plug it in the power outlet and turn it on. Since Dell wireless-enabled printers have built-in wireless cards, your wireless computer will automatically be able to detect it on your wireless network.

Step3: Turn on your computer and login using your username and password. Select your wireless network and connect to it. Enter the password for your wireless network when prompted. When connected with your wireless network, insert the software installation disk that came with your Dell printer. Follow the onscreen prompts and connect the USB wireless setup cable when prompted.

Step4: Connect the square end of the USB cable to the port on the back of the wireless printer, and then connect the flat end to a free USB port on your computer. The software installation will inform you when the cable can be removed. After the cable has been removed, the printer is set up and ready for use.

When your printer does not receive all the data from the printer queue that time printer give the spooler error. To fix this error follow this blog-How to Fix a Printer Spooler Error.

Note: To get printer support, you can reach  online technical support service desk from V tech-squad at their Toll Free No +1-877-452-9201.
 

See also: Steps for Dell 1720 Printer Troubleshooting
Read More
Posted in connect to printer wireless, dell wireless printer, how to set up dell wireless printer | No comments

Thursday, 17 May 2012

How to Scan Windows and Fix Errors

Posted on 04:29 by Unknown
scan windows and fix errors
Microsoft’s Windows 7 operating systems include a built-in utility that allows you to scan your computer and fix file system errors automatically. This task helps you to improve the hard drive performance and solve drive functionality problems. Once you understand how to access the utility and set the appropriate options, scanning Windows and fixing file system issues becomes a quick process. Follow the given steps to perform this task.
To change the windows wireless firewall settings ,follow this blog-How to Change the Windows Wireless Firewall Settings.

Step1:  Close all programs.

Step2:  Click the Windows "Start" button and select "Computer."

Step3: Right-click the name of the drive which you want to scan and select "Properties." By default, Windows resides in "C:" drive.

Step4: Select the "Tools" tab located near the top of the resulting dialog box.

Step5:  Click the "Check Now" button, located below the "Error-checking" heading. Confirm your choice if prompted by Windows.

Step6:  Check only the box labeled "Automatically fix file system errors."

Step7:  Click "Start." The scanning process begins immediately. It generally completes within 10 minutes.

To solve windows 7 bootmgr missing error,follow this article-How to Resolve Windows 7 BOOTMGR Missing Error.

Note: If you are  not able  to solve this problem then you can reach online technical support service desk of V tech-squad at their Toll Free No +1-877-452-9201.  


Read More
Posted in fix windows errors, Scan Windows and Fix Errors | No comments

Tuesday, 15 May 2012

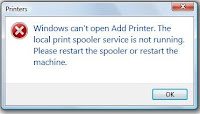
How to Fix a Printer Spooler Error

Posted on 04:06 by Unknown
fix a printer spooler error
The print spooler service controls your print job queue. It acts as an interface between your computer and the printer to send this data to the printer's queue. A print spooler error indicates that something went wrong with the print spooler, and the service needs restarting before you can continue sending jobs to the printer. Printer spooler error detect that printer not receive all of the data from the printer queue.
If you want to install new hp photosmart printer then follow my blog-How to Install an HP Photosmart Printer.

Step1: From start button, choose control panel.

Step2: In the text field at the top right of the window, type "Administrative Tools" and click on the result.

Step3: Double-click the "Services" option in this panel. Go through the services list to find "Print Spooler." Double-click "Print Spooler" to launch the Properties menu.

Step4:  Change "Startup Type" to "Automatic" on the drop-down menu if it is not already selected.

Step5: Click the "Start" button if it is not grayed out. Click "OK." Windows starts up the Print Spooler service and your printer is to accept data once again.

If you want to connect hp printer with your computer then follow this article -How to Connect My HP Printer to a Computer.

Note:If you want to get technical support  for any printer problem  then you can reach online technical support service desk of V tech-squad at their Toll Free No +1-877-452-9201.  

Read More
Posted in fix spooler error, printer spooler error | No comments

Thursday, 26 April 2012

How to Create a Virtual Drive

Posted on 02:51 by Unknown
A virtual drive is a form of drive on your PC that maps to a virtual folder. This is a special folder that acts as if it's a separate drive in itself. With a virtual drive, users can create virtual CD-ROM and DVD-ROM drives. CDs and DVDs can be mounted as a disk image, which is usually in ISO, CUE, or BIN format. . A key advantage of a virtual drive is that it usually saves time. A virtual CD drive, for example, can be read much faster than a physical CD drive because it exists on the hard drive.
If you want to partition hard drive in windows 7 computer then follow this article-How to Partition Hard Drive in Windows 7 Computer.

create a virtual drive
Step1: From start menu, right clicks on computer then click on manage.

Step2: Right-click "Disk Management" in the left pane and from action and click "Create VHD." Follow the onscreen prompts to create a virtual drive.

Step3:  Right-click the new drive and click "Initialize Disk." Then click "OK."

Step4:Browse to the directory you want the disk to reside, choose the size you want it to be, and select dynamic or a fixed. If you want the disk to expand in size as you add files to it, then pick Dynamically expanding. Check Fixed size if you want a specific size and for it to stay that way.

Step5: Right-click the new drive again and click "New Simple Volume." Follow the onscreen prompts. Once that setup is finished, your virtual drive is ready for use.

Step6: Close your Registry Editor and restart your PC. And you're done!

Stores all the system information including new and modified in your system need backup registry.To create backup registry follow my blog-How to Backup Registry in Windows 7.

Note:If you want to get technical support  for windows related problem  then you can reach online technical support service desk of V tech-squad at their Toll Free No +1-877-452-9201. 


Read More
Posted in create virtual drive, creating virtual drive, virtual drive | No comments

Tuesday, 24 April 2012

How to Perform a Dell System Restore

Posted on 03:31 by Unknown
dell system restore
Modern Dell laptops are containing the feature that restores your laptop operating system to its original configuration. If you have own a Dell computer system, you want to perform a Dell system restore then follow the given easy steps. This can be helpful if you are upgrading laptop or getting problems with the operating system.
You can also see restore Dell Computer Drivers.Follow this article-How to Restore Dell Computer Drivers.

Step1: Back up you all data which you want to save. When you will reformat and restore the computer, all existing data will be completely erased. This includes any email, program files and drivers. Save your Documents folder.

Step2: Disconnect peripherals device-- printer, modem, USB -- from the computer, leaving only your monitor, mouse and keyboard.

Step3: Start to reboot your system. As it boots up, press and hold the "F8" key until you see the Advanced Boot Options menu. When windows logo appears then restart the computer and try to enter the Advanced Boot Options menu again.

Step4: With the help of down arrow on your keyboard to choose "Repair Your Computer." Press "Enter."

Step5: Log in with an administrator account and click "OK."

Step6: Click "Dell Factory Image Restore" on the screen that appears and then click "Next."

Step7: Click "Yes" to confirm that you want to restore the laptop to its factory settings and click "Next."

Step8: Click "Finish" to reboot your computer after the restore process has finished. Your hard drive is now restored to its original configuration.

Step9: You can reinstall any applications and files which you want on the laptop.

 If you want fix dell laptop then follow my blog-How to Fix a Dell Laptop.

Note:If you want to get dell support then you can reach online technical support service desk of V tech-squad at their Toll Free No +1-877-452-9201. 


Read More
Posted in dell help, dell system restore | No comments

Thursday, 19 April 2012

How to Share Printers on Windows XP and Windows 7

Posted on 04:04 by Unknown
share printer on windows XP and windows7
If you have a home network and are running Windows 7 and have XP on other PC(s) you want to share files between them.  To share printers on a network, you must add both computers to the same homegroup, configure the network sharing options and then install the printer to the machine.
If you have all windows 7 system and you want share printer with them then follow this blog-How to Share Printers in Windows 7 .

Step1: First make sure both machines are members of the same Workgroup .

Step2: On the Windows 7 machine go into Control Panel -> All Control Panel Items ->Network and Sharing Center then click on Change advanced sharing settings.

Step3: Then click "Change advanced sharing settings..." Click "Turn on network discovery" and "Turn on file and printer sharing." Click "Save changes."

Step4:  Sign on to Windows XP and connect to the network. Click "Start." Right-click "My Computer." Click the "Computer Name" tab.

Step5:  Enter the Windows 7 workgroup name into the "Workgroup" field. Click "OK" three times to close all of the dialog boxes. Restart the Windows XP PC.

Step6:  From Start menu go to Control Panel and Click "Printers and Other Hardware," then "Printers and Faxes."

Step7: Right-click the printer which you want to share. Choose "Sharing..." from the context menu. Click the "Sharing" tab, and then click the radio button next to "Share this printer." Click "OK."

Install Printer on Windows XP
To install printer on windows xp follow the given procedure :
  • From start menu go to my computer and choose the option My Network Places from the left pane. Then click View workgroup computers from the "Network Tasks" section.
  • Double-click on the Windows 7 computer. Enter the user name and password for the Windows 7 account. Click "OK."
  • Select a printer to use, then click "Connect." Click "Yes" when the "Connect to Printer" dialog box appears. Windows XP will install the printer to the computer.
Install Printer on Windows 7

  • Sign on to Windows 7 and connect to the network. From start menu go to the control panel and click on Hardware and Sound.
  • Select add a printer option from the "Devices and Printers" category. Click "Add a network, wireless or Bluetooth printer."
  • After completing the all steps choose the Windows XP printer from the list. Click "Next." Click "Install driver and Windows 7 will install the Windows XP printer to the PC. Click "Finish."
If you want to troubleshoot your HP printer then follow this article-Printer Issues - Troubleshooting Your HP Printer Problems.

Note:If you are not able to work on the above steps, you can reach  online technical support service desk from V tech-squad at their Toll Free No +1-877-452-9201.


Read More
Posted in printer sharing windows 7, share printer windows xp and 7 | No comments

Thursday, 12 April 2012

How to Fix Error 1303 on a Dell Laptop

Posted on 03:08 by Unknown
fix error 1303 on a dell laptop
Many times your dell laptop generates a 1303 error when you are opening an Adobe file or installing Adobe software. When that error message occurs, it means you don't her permissions to perform the installation. But the issue can be resolved in a few steps. Follow the given steps which will help you to resolve this error.
If  you want to fix the dell error code 0141 then follow my blog-How to Resolve Dell Error Code 0141 .

Step1:  Right-click on the My Computer and select ‘Explore ‘to open Windows Explorer. And Go to the "Documents and Settings" folder and select "All Users."

Step2: From tools menu choose folder option from the list. Select the "View" tab and make sure "Show hidden files and folders" is selected.

Step3: After completing the above steps go back to windows explorer and right click on the ‘application data’ folder. Then choose the properties from the list.

Step4: Then select the security tab and highlight the ‘administrators’ group. Check the ‘Allow Full Control’ check box.

Step5: Click the "Advanced" button and make sure the "Replace permissions" check box is checked. Click "OK" to accept your choices.

Note:If you want to get dell tech support then you can reach online technical support service desk of V tech-squad at their Toll Free No +1-877-452-9201.

Read More
Posted in error 1303 windows 7, error code 1303, windows 7 error 1303 | No comments

Tuesday, 10 April 2012

Top 10 problems with HP printers and solutions

Posted on 04:39 by Unknown
hp printer problems
HP manufactures a wide range of printers, from inexpensive ink jet models for home users through laser printers and large-format units found in digital studios. Although new models are constantly introduced, many legacy HP laser printers are considered workhorses, so it's not unusual to see them still on the job. No matter what kind of HP printer you use, realize that they all are susceptible to a large number of problems. Here is the list of common hp printer problems.If you want to install new hp photosmart printer then follow my blog-How to Install an HP Photosmart Printer

1. Paper jams
A printer will jam for any number of reasons: It's dirty, the wrong paper type is being used, or the rollers on the printer that feed the paper through its pathway are worn down. While cleaning the printer periodically and using the correct paper type are easy fixes, roller replacement can be a difficult job depending on the model of HP printer. For some HP printers, the rollers are easily accessible, but you'll need to completely tear down other models to remove the rollers.

2. Some or all of the printing on the page is faded
A faded print image is normally the result of one of three conditions: The printer is getting low on toner, the print density is set too low, or Economode printing is turned on. For the last two settings, a printer self-test (typically a separate button on the printer) will show what the current settings are. If Economode is on, and users are complaining about how light the print is, turn it off and/or set the print density higher. If the toner is low, simply removing the cartridge and shaking it to redistribute the toner more evenly can temporarily resolve the problem until you can replace the cartridge.

3. Ghosting
Ghosting is a condition where the image prints properly, but a much lighter copy of the image also prints elsewhere. This can be due to a problem with the power outlet that is supplying power to the printer. Check the power outlet by plugging in a different printer to see if the same results occur. Ghosting can also be caused when consumable printer parts (such as the drum or imaging kit) are near the end of their life.

4. Toner smears or does not stay on the paper
If words and images come off the paper when a hand is run across them, there are a few possible problems. First, the fuser assembly may be damaged or at the end of its life. The solution is to replace the fuser assembly. Repairing a fuser assembly is generally not recommended because the fuser is considered a consumable printer part and not worth the time or effort to fix. Second, the toner cartridge may be defective and letting too much toner out at one time. In a black-and-white laser printer, the solution is to replace the toner cartridge.

5. Printer is displaying a 50.4 error message
A 50.4 error message on some of the newer HP LaserJet printers indicates a problem with the power supply. If the printer is connected to a UPS, disconnect it, or disconnect it from a power strip and plug it directly into a wall outlet. A laser printer should never be plugged into a UPS, because the UPS can be damaged by the surges of power required by a printer to keep the fuser assembly warm. If that doesn't work, make sure that all of the components in the printer are seated properly.

6. Can't find a driver for a particular operating system
As new operating systems are released, new drivers will need to be loaded for your existing printers. Not all printers have a driver for every OS. In these cases, it's best to consult the printer manual and find out what printers the drivers will emulate. While not all of the functionality of the printer will be available under this emulation, at least basic printing will work. For example, most HP printers will print with the HP LaserJet II driver installed, although specific options, such as duplexing, will not work.

7. Printer is not printing from the expected paper tray
Look in two places to correct this particular error. First, look on the printing PC, and second, on the printer. If the application is set to print to the wrong paper tray, correct it within the application by clicking on Printer Properties and finding the Tray Selection source. On the printer, make sure that the paper sizes in the control panel match what is actually in the paper trays.

8. Printer picks up all the paper from the manual feed tray rather than one sheet
The pad that is responsible for separating the paper has likely worn out and needs to be replaced. You can order and install a new pad without sending the printer out for repair. It is also possible that the paper is wet due to humidity. Make sure the paper is properly stored and that it is -fanned" before putting it into the printer.

9. Printer is displaying a 79 error
A 79 error can be the result of a problem with the network print server that services the printer. When troubleshooting a 79 error, first open the Printer folder from the Start menu on the Print server to make sure there are no jobs pending. A 79 error can also indicate a failure of a printer add-on component, such as an MIO card or a RAM module. All add-ons should be removed and then added back to the printer one by one to determine which module may be at fault.

10. Trouble printing onto envelopes
Envelopes can cause many problems for laser printers. Choose envelopes that are close to 9kg paper in weight and thickness. Also, make sure that the adhesive on the envelope is capable of withstanding the heat that the fuser puts out to keep the printing on the page. If you don't, the envelopes will come out of the printer already sealed. If envelopes are coming out of the printer wrinkled, they may be too stiff for the paper path. Open the rear of the printer and let them exit at that location instead.
If you want to connect hp printer with your computer then follow this article- How to Connect My HP Printer to a Computer.
If you want to get hp tech support then you can reach online technical support service desk of V tech-squad at their Toll Free No +1-877-452-9201.
Read More
Posted in fix hp printer problems, printer problems hp | No comments

Thursday, 5 April 2012

How to Resolve Dell Error Code 0141

Posted on 02:18 by Unknown
dell error
The Dell error code 0141 is a hardware related error which appears when you first load your Dell computer. The 0141 error is a problem caused by an issue / mismatch between the hard drive and your operating system of your PC. The error is typically shown to warn you about the lack of an internal hard drive, but if there’s one in your system it suggests that this problem is caused by a mismatch inside the Windows system.

The typical causes of this error are as follows:
  • Corrupt or damaged Windows processes
  • Damaged registry settings on your system
  • A computer infected with viruses or malware
If you want to fix your dell laptop then follow my blog-How to Fix a Dell Laptop

Step 1 – Use The “Dell Hard Drive Self-Test” Facility

The “Self Hard Drive Test” is a feature of Dell computers which allows you to test the integrity and reliability of your hard drive(s) on your system. This tool is used to help you gauge how well your hard drive is running and will allow you to pinpoint the exact cause of the 0141 error on your Dell PC.

Using The Self-Test Utility From The Dell Resource CD:
If you do not have the Dell resource CD installed on your PC. Please use the steps below this method to install it.
  • Restart your PC and reinsert the resource CD into the CD or DVD drive.
  • When Welcome Dell System Owner window will open then click Next to display the Criteria page.
  • Under the System Criteria column, choose ALL for the system model, ALL for the operating system, ALL for the device type, and DIAGNOSTICS under Topics.Click Dell DST Diagnostic Utility and run the DST diagnostics utility.
  • If the diagnostic test reports an error, refer to Dell Troubleshooting or get dell tech support.

How To Install The Dell Resource CD:
  • Insert the CD into the CD or DVD drive to display the CD auto-runs and the installation screen.
  • Click OK to start the installation and display the InstallShield window. And click next to continue and allow the files to copy to the hard drive.
  • When the InstallShield Complete Screen window appears, click Yes, I want to restart my computer now. Then click finish.
Performing this self-test will show you what is happening on your computer, and will allow you to see whether your hard drive has any sort of intermittent problem or has any damaged parts to it. This will give you a much better understanding of the problem, and should help you if you want to contact Dell Support about the issue. 

Step 2 – Scan For Viruses

 Viruses are also a major reason why the Dell 0141 error will show. Viruses are basically small software programs which latch onto your PC and corrupt many of the programs and files that Windows needs to run. In order to ensure your system is able to run as smoothly and effectively as possible (without the 0141 error), you should use an antivirus program to remove any of the possible infections inside your PC.

Step 3 – Clean Out The Registry

The registry is also a big cause of problems on many Dell systems, and is one of the big causes of the 0141 error. This is a part of your computer which stores settings and information, allowing your PC to “remember” many different files and settings for your system. Unfortunately, the registry is constantly causing problems on your PC as it makes Windows unable to read the files and settings it needs to run, as it’s forever being corrupted and damaged.
If you want to restore dell computer driver then follow this article-How to Restore Dell Computer Drivers.
Read More
Posted in dell error code 0141, dell support | No comments

Monday, 2 April 2012

How to Fix HP Printer Errors

Posted on 22:07 by Unknown
hp printer
Use a printer long enough and you’ll eventually see error messages. From paper jams, any software problem, disconnect your printer cable, to obscure code errors, as with the rest of your system you will eventually need to do a little troubleshooting of your own. Follow the given step one by one to fix printer error.
If you want to install an HP photosmart printer then follow my blog-How to Install an HP Photosmart Printer which i have discussed in same blog.

Step1: Check the HP printer cables which is properly connected or not. You can turn off the printer, unplug it and disconnect all of the printer cables. And again Plug it back in and reconnect the cables to see if the error has cleared.

Step2: Check the HP printer cartridges and print heads to ensure that they're installed properly. Also see if the printer cartridges are empty. If the ink cartridges have sufficient ink, reinstall the cartridges and the print heads. If an ink cartridge is empty, replace it with a new one.

Step3: Make sure that the HP printer's software is properly installed. If the device does not respond when you try to print or the printer software won't initialize, uninstall and reinstall the HP printer software.

Step4:  See if your computer's firewall is preventing the HP printer from functioning properly. Open your firewall preferences and add the printer software executable file (*.exe) as an exception or disable the firewall temporarily to see if this fixes the error.

Step5: Check the print settings in the HP printer software if the pages don't print properly. Make sure that the margins are set to at least the minimum margins that your HP printer supports. Also ensure that you've selected the correct printer settings for the paper size and type of document you're trying to print. To access these printer settings more easily, open the HP Solution Center.

Step6: Clean and align the printer cartridges. Open the software for your HP printer or the HP Solution Center to access these maintenance features.

Step7: Double-click on the HP printer icon in the system tray on the bottom right of the screen, if it appears. Look under "Status" in the printing queue to read the error messages. Right-click on the entries and select "Cancel," if necessary.

Step8: Navigate to the HP website to search on your specific printer model if these steps fail to fix the printer error. Click on the “Support and Troubleshooting” option .Click "Solve a Problem" to find solutions for the HP printer's specific error. Also check the "Software and Downloads" area for software and driver updates.

If you want to install HP printer without disk then follow this article-How to Install HP Printer Without A Disk.
If you are facing any problem from above steps and need technical support ,you can reach V tech-squad online technical support at their Toll Free No +1-877-452-9201.
 
Read More
Posted in fix hp printer problems, how to fix hp printer | No comments

Wednesday, 28 March 2012

How to fix Common dell inspiron 1545 problems and solutions

Posted on 22:41 by Unknown
dell inspiration 1545
The Inspiron 1545 was a mainstream notebook computer developed by Dell and released in 2009. There are various common computer problems a user may face while using the Dell Inspiron 1545 laptop. Such Dell computer problems can be common or rare in nature and like ways can be resolved in some time or may take forever. Here is some common problems and their solution for free dell support guide.
If you want to fix dell common error related to power supply,screen problem hard drive problem then follow my blog-How to fix a dell laptop, which i have discussed in same blog.

Overheat problem : overheats and shut down automatically are the common problem with Dell Inspiron 1545. Overheating can also lead to several other Dell computer problems like the BSOD error or data loss etc. Hot climate, consistent long use, or dust often brings your laptop to swelter.
 To handle the dust factor-turn off the laptop and open it. Use the screwdriver to loosen the screws and afterwards remove the back cover. Carefully remove the processor thermal cooling assembly and remove any mass of dust\lint. Take a soft cloth or cotton ball to remove the dust. Replace the assembly and module cover as it is.

If you are not sure how to open this back cover of your laptop and fix the thermal cooling assembly, check the original documentation that came with your Dell Inspiron. Besides, place your laptop on a laptop stand to let the heat vent properly. If you don’t have a laptop stand, you can buy one from the market or on the internet. Also check that the fan is running properly.

Bluetooth device not working properly: It‘s again very common for your Dell Inspiron computer not to recognize your Bluetooth phone or other such device. Such type of Dell computer problem is mostly caused by drivers. To make the Bluetooth device working properly, open your web browser and visit the Dell website or your Bluetooth’s. If you are on the Dell website, browse to the Drives & Downloads option (a link on the Dell homepage) and choose your Dell Inspiron model. If needed, confirm and proceed.

Click the Network link and download the Wireless 365 Bluetooth Module (Bluetooth 2.1 + EDR) file. When prompted, save the file and exit the browser window . Make sure that your Bluetooth device is activated. Thereafter, browse to the saved file’s location, look for the .exe file, and open it. Follow the instructions and complete the installation. When asked during the installation, turn on your Bluetooth if it is not already turned on. Do not cancel or close any window during this procedure. Let it finish completely. When done, reboot your computer. Your Bluetooth should be working fine now.

Battery not charging : It often happens that the battery of your laptop stops charging, making it an ordinary, useless piece of box that cannot be used for any purpose. To fix this Dell computer problem, turn off the laptop and detach the charger. Now turn the laptop upside down and remove the battery by opening its case. If you don’t know how to take the battery out of your laptop, refer to the Dell documentation that came with your laptop. You can also visit the Dell website for more help on this topic. Once the battery is removed, press and hold the power button for 7-10 seconds. Release it afterwards. Now put the battery back in the place, cover it, and then turn on your laptop. Connect the charger back and check, it should work fine now.

There is one more thing that you should do in case that battery is still not charging. You must update the BIOS settings of the laptop. Visit the Dell website and download the latest BIOS updates for your Dell Inspiron 1545. Before you run the BIOS updates file, close all the windows on your computer. When done, execute the BIOS file and follow the on-screen procedure. When done, reboot your computer. Other than these, if your charger or battery appears to have a problem, replace it.

If you want to restore dell computer driver then follow this article,How to Restore Dell Computer Drivers.
And if you want get dell support then you can reach online technical support service desk of V tech-squad at their Toll Free No +1-877-452-9201.


Read More
Posted in inspiron 1545 problems | No comments

Monday, 26 March 2012

How to Install an HP Photosmart Printer

Posted on 04:35 by Unknown
HP Photosmart printers and all-in-ones to create laser-quality documents, lab-quality photos, and projects at home. HP Photosmart printers are compact printers built specifically for printing high-quality photographs from digital files. With built-in card readers and a USB port, later models of the Photosmart printer series don't even require a computer to print. Installing the HP Photosmart printer will allow you to directly print images from your computer.
If you want fix the dell printer problem then follow this blog ,How to Troubleshoot Your Dell Printer,which i have discussed in same blog.
hp photosmart printer

Step1: Plug in the power cord and connect the power cord from the back of the printer

Step2: Install the ink cartridge. Open the cartridge package and remove the tape that is covering the copper contacts. Insert the cartridge into the cartridge cradle, with the contacts facing towards the printer and the nozzle pointing down. Push the cartridge into the cradle until you feel it snap in.

Step3: Load the sample card that came with the printer and turn on the printer by pressing the "On" button. Press the "OK" button to calibrate the printer.

Step4: Insert the Product CD that came with the PhotoSmart Printer and follow the onscreen instructions to install the drives and a software suite recommended for most users.

Step5: Connect the printer to the computer using the USB cable and follow the onscreen instructions to install the Photosmart Printer. Print a picture to test the printer by right-clicking on a digital photo on your computer and selecting "Print."
If you want to connect hp printer with your computer then follow this article How to Connect My HP Printer to a Computer.
If you want to get hp tech support then you can reach online technical support service desk of V tech-squad at their Toll Free No +1-877-452-9201.

Read More
Posted in install hp photosmart printer, install hp printer | No comments

Tuesday, 20 March 2012

How to Troubleshoot No Sound From Computer Speakers

Posted on 01:59 by Unknown
When you no longer can hear sound come from your computer speakers and you want to fix this problem. Check your computer hardware and operating system settings before calling a technician. Here are the given steps which can help you to fix this problem. Just check steps one by one.If you want fix sound problem in dell laptop then follow this blog.How to fix if sound not working on dell laptop  .

Step1: First check your computer and speakers are plugged in, have power and are turned on. If the speakers are plugged in but don't appear to have any power, plug them into a different outlet. If your computer uses a USB cable to supply power then check that the USB cable of your speakers is connected securely to the USB port of your computer.

Step2: If you still don't have any sound make sure the cable connecting the speakers to the computer) is plugged into the green audio output jack on the PC. If you're using self-powered USB speakers, remove the USB cable and plug it into a different USB port. If you're using outlet-powered speakers and have a working set handy, replace the suspected non-working speakers with the working pair to test.

Step3: If you are using add-on sound card and none of the hardware or software fixes helps, you should replace the sound card. If you use on-board sound, it will probably pay to purchase an inexpensive sound card rather than a new motherboard. Check the BIOS system to determine whether you have inadvertently disabled your on-board sound.

no sound from computer speakers
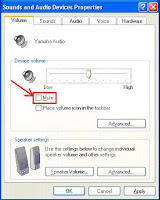
Step4: from start menu and select the "Control Panel" and "Sounds and Audio Devices." Then click the "Volume" tab. If everything is grayed out, proceed to next step. Check the mute box and device volume.

Step5: Click the "Sounds" tab. Under "Sound Scheme," determine whether "No Sounds" is selected. If it is, click "Sound Schemes." A drop-down list will appear. Select "Windows Default" as the scheme. To test your sound now, click on a sound listed below the "Program Events" window. The sounds will be indicated by a small "Speaker" icon located next to them. Left-click the sound once, then click the "Play" button. If you still don't hear sound, proceed with the next step.

Step6: In "Sound Playback" option, click the "Audio" tab; check your sound card is selected as the default playback device. Only one device appears here, unless you have multiple playback devices installed.

Step7: If everything is grayed out, you either do not have a playback device installed or your drivers are corrupted and need to be replaced. If you want reinstall the appropriate drivers then right click on the computer and go to the properties and click the hardware tab and then click the device manager button. The Device Manager will open.

Step8: Look for either a red X or a yellow question mark listed under "Sound, Video, and Game Controllers." If a red X appears, right-click the device with the X and select "Enable" from the pop-up menu. Test your sound at this point. If a yellow question mark appears, right-click the device, click "Properties" from the pop-up menu, and then click the "Driver" tab on the window that appears. Next, click the "Roll Back Driver" button to roll back to the previous drivers that were functioning correctly. Restart your computer when prompted.

Step9: Now you can uninstall and reinstall the device. If you want to do this then right-click the device and select "Uninstall" from the pop-up menu. Restart your computer. Windows will automatically detect and install your audio device upon boot-up. If you still don't hear any sound from your computer speakers, contact a qualified computer technician.

Note:If you want to get technical support  for windows problem or any other technical problem related to your computer  then you can reach online technical support service desk of V tech-squad at their Toll Free No +1-877-452-9201.


Read More
Posted in how to fix sound on computer, troubleshoot no sound | No comments

Thursday, 15 March 2012

How to Fix a Dell Laptop

Posted on 02:42 by Unknown
fix dell laptop
Fixing your dell system are not straightforward tasks, if there are a number of issues to connect with your laptop. Narrowing down the possibilities for your Dell errors is important to fixing the machine, whether it is a hard drive error, video problem or any other problem.

The below instruction will help to fix your common laptop problem like-related to power supply, screen problem and hard drive issue. 
If you want to fix the error codes in dell laptop then follow my blog-how to fix common dell error codes.

Step1: Check the power supply. It is the first step in diagnosing a problem for a dell laptop. If there is no power going to the laptop  then check the power source otherwise unplug the power adapter and plug in another electrical device to this same socket. If this electrical device also isn't powered, the problem is with the socket.

Step2: Check the battery indicator light on your laptop. It should be on the underside or on the side of the PC. It may be that your battery needs to be swapped. Dell batteries typically are good for 1000 partial/full charges. After that point and leading up to it, they begin to hold their charge for less and less time.

Step3: If any problem in laptop screen like- LCD display cracked in any way, If so, attend to it as soon as possible. If the screen is flickering, it is likely a failed or failing backlight. you should take it into local computer shop or ship the unit to dell.

Step4: Now check the video failure and listen closely to your computer. Do you hear the Dell computer fan running? If you can no longer hear the fan running, the problem not with video but with the main board or power system. To see if it is indeed a video problem, use a VGA cable to hook up another, outside monitor to your Dell. If this monitor does not at least light up when you power up your system, you can count that this is not a fan-related problem, but a video failure to same degree. You should consult from professional help for your Dell laptop.

Step5: If you are facing problem to access the files in your system which is likely related to hard drive issue. But unlike the other problems, replacing or fixing a hard drive on a Dell is a fairly straightforward task. A new hard drive can be obtained from a number of different vendors. If you are a power user, a hard drive of 500GB to over 1TB (1000 GB) may be very desirable. If you are replacing new hard drive then reinstall the operating system.

Note:If you want to get dell support then you can reach online technical support service desk of V tech-squad at their Toll Free No +1-877-452-9201.
Read More
Posted in dell support, fix dell laptop | No comments

How to Troubleshoot Your Dell Printer

Posted on 02:21 by Unknown
 dell printer
Whenever we are rushing to complete a project for school or a report for work, somehow our printers just seem to fail on the last minute. No printer model is free from this, not even Dell printers. Then you have option to troubleshoot your Dell printer. Following steps help you -how to troubleshoot a Dell printer to fix your Dell printer and restore your productivity.
If you want troubleshoot your Dell 1720dn printer then follow this blog,How to Troubleshoot Grinding on the Dell 1720DN Printer which i have discussed in same blog. And if you want to get technical support for printer then follow this article ,where you can get idea about technical printer support guide.Finding Online Technical Support for Printers.

Step1: check your dell printer power source which is plug in or not. Power fault may cause some of your dell printer problems.

Step2: Verify that your Dell printer is plugged securely into your computer. Sometimes, the printer cable may be disconnected when you are moving or using your PC. This may result in printer errors when the Dell printer tries to send printer data to your computer, and vice versa. Jiggle the printer cable gently to check that it is plugged in firmly.

Step3: Restart your computer. Internal software conflicts and errors can sometimes prevent your Dell printer from completing the printing job successfully. Restarting your computer clears the system cache and may help resolve these issues when troubleshooting your Dell printer.

Step4: Turn off the Dell printer by pressing its Power button. Turn the Dell printer on again while simultaneously holding down the up arrow key and the down arrow key, located on the front panel of the printer. This initiates the Dell printer's "Customer Mode" menu on the printer's front display screen.

Step5: Test the Dell printer's print quality by pressing the arrow key to select each of the printer's types of ink and pressing the Return key to initiate a test print. This can help you to troubleshoot whether you have a problem with the Dell printer's connection to your computer or a hardware issue.

Step6: Clear the Dell printer's NVRAM cache to help troubleshoot the Dell printer. Press Menu on the front display panel and select Configure. Use the arrow keys to click Maintenance and then select Init NVRAM. Press the return panel to clear the Dell printer's internal memory. Restart the printer by turning it off with the Power button, then turning it back on.

Step7: If your dell printer troubleshooting methods fail to solve specific problem then you can contact Dell's customer service center.

If you want to get dell support then you can reach online technical support service desk of V tech-squad at their Toll Free No +1-877-452-9201.

Read More
Posted in dell printers troubleshooting, printer support | No comments

Wednesday, 14 March 2012

How to Troubleshoot Grinding on the Dell 1720DN Printer

Posted on 02:09 by Unknown
The Dell 1720dn is a monochrome laser printer that is designed for home offices. The printer features a built-in Ethernet jack to allow you to add the device to your home network. Unfortunately, over time your printer can experience a paper jam where paper gets dislodged inside the printer and causes it to make a loud grinding noise. Removing a paper jam from your Dell 1720dn printer is simple, and soon your printer will no longer make a grinding noise during every print job.
If you want to troubleshoot your dell printer then follow this blog,How to Troubleshoot Your Dell Printer,which i have discussed in same blog.

Step1: Disconnect power from your Dell 1720dn laser printer's power cord to avoid injury while working inside the printer. Slide the paper feed tray out of the bottom of the printer and remove any folded or crumpled up pieces of paper.

Step2: Pull on the front panel of the printer and open it to access the inner components of the Dell 1720dn printer. Gently pull out and remove the entire gray toner cartridge bay from the inside of the printer. Place the toner cartridge bay in a dark area, as excessive light can damage the cartridge and cause your future prints to fade.

Step3: Pull out any trapped paper underneath the center of the Dell 1720dn printer where the cartridge bay is housed and discard it.

Step4: Place the toner cartridge bay back into the front of the Dell 1720dn laser printer. Ensure that the bay locks into place or else the printer will not function correctly. Close the front panel of the printer and reconnect the power cord. Press the "Power" button to power the printer back on and print a test document to ensure that the paper jams have been completely cleared and that the grinding noise has gone away.
If you want to get dell support then you can reach online technical support service desk of V tech-squad at their Toll Free No +1-877-452-9201.

Read More
Posted in dell support, dell technical support | No comments

Tuesday, 6 March 2012

How to Recover Deleted Files from Window XP

Posted on 03:42 by Unknown
In windows XP, if you delete a file from any directory or even from the recycling bin, it’s not gone forever. Lost files can occur for many reasons like- File was mistakenly deleted, File was corrupt and deleted by scan disk, another program deleted the file or normally you deleted files to change your disk space which is available for other programs.
As long as you have available hard drive space, you should be able to recover the files with the right utility program. If you find that your deleted files are unavailable in the recycle bin that means the Bin's "INFO" file has been damaged, but it is still possible to recover the files.Following steps will help you to recover your deleted files from windows XP.
If you want to know more about recover files and how to recover deleted files then follow this article.Steps to Recover Deleted Files in Windows XP

Step1: Load the utility software program "Recover My Files" into your computer. If it is a downloaded program then extract its contents to your hard drive. If it is from a disc, run the program and install it after recovering your files to prevent the drive from being rewritten.

Step2: Follow the steps in the program for recovering the file. This usually involves scanning your hard drive for all deleted files and restoring it by copying it.

Step3: If file are in recycle bin then select "Restore". This command reads the files original path from the "INFO" file renames it and restores its directory entry.

Step4:  Restore the file elsewhere if the Recycle Bin's "INFO" file was damaged. This causes the bin to appear empty when your file is there. In the Start command, go to "Find Files" or "Folders" or "Search" in Windows XP and then rename the deleted file once you've found it.

Step5: Delete the "INFO" file if you are still unable to recover your file. Open a DOS command window by going to "Start" then "Programs" and choosing MS-DOS Prompt. Enter the following commands in order: CD \RECYCLED, ATTRIB -H INF*, DEL INFO*. And EXIT.
To make the Recycled folder the current folder type: CD \RECYCLED
To unhide the INFO file type: ATTRIB -H INF*
To delete the INFO file type: DEL INFO*.
To close the DOS window type: EXIT

Step6: Reboot the system after deleting the "INFO" file. Windows will create a new "INFO" file upon restarting and you may now find the files in the "Recycle Bin" now.
These tips are simple and useful for normal windows user.If you want to fix slow process in windows XP then follow this blog-How to Fix Windows Xp Slow Startup ,which i have discussed in same blog.

Note: If you want to get technical support  for windows related problem  then you can reach online technical support service desk of V tech-squad at their Toll Free No +1-877-452-9201.
Read More
Posted in recover deleted file windows xp, recovering deleted files | No comments

Thursday, 1 March 2012

How to Fix Windows Xp Slow Startup

Posted on 03:34 by Unknown
Extremely slow boot up with Window XP commonly relate to two aspects. One is the startup program and the other is system service. In this blog, I will tell you the way to fix Window xp slow startup.
windows xpThere are two things that can cause your Windows XP computer to boot slowly:
  • Your Windows registry is in need of a thorough cleaning
  • You have too many “unnecessary” programs loading when your computer starts
While there could be a few other reasons for a slow start up for your Windows PC, these are the two major culprits for this problem. Get along with the steps below for fix windows xp slow startup and give better performance. If you find the steps to be much technical for you to handle then you also fix your Windows Errors That Appear in Your Start up from How to Fix Windows Errors That Appear in Your Startup. 

Step1: In first step, try to fix Windows XP slow startup and what programs are loading when you startup Windows XP. From start menu, click on run, then type in msconfig and press enter. Look at the Boot.ini tab. In the box labeled Timeout change the time from the default 30 to 3.After changing ,check how long it wait to before booting.

Step2: click on the tab labeled startup. It will display what programs Windows XP startup is loading. Unclick any of the boxes that you do not need to have running all the time. This can greatly fix Windows XP slow startup without having to wait for so many programs to load every time.

Step3: for download a free registry cleaner then go to download.com. Registry cleaner is very popular one and it always backup your registries before you do anything to change it. Registry cleaner that will remove old code from the registry that is no longer needed.

Step4: The system can slow due to RAM, which is lack of memory. Increase your system speed, add more RAM, which will give better performance.
All these are my tips to fix Windows XP slow startup. There are other things you can do, most require a lot of work and knowledge and could cause you a lot of problems if done incorrectly.If you want restore the files that have been deleted accidentally by users from their Windows XP computer then follow this article Steps to Recover Deleted Files in Windows XP.

Note: Do not get in any shot of computer problem if you are not confident performing the steps detailed above. You can reach online technical support service desk of V tech-squad at their Toll Free No +1-877-452-9201.


Read More
Posted in windows xp fix, windows xp help, windows xp problems, windows xp support | No comments

Thursday, 16 February 2012

How to find Network Settings in Windows Vista

Posted on 01:29 by Unknown
Microsoft Windows Vista control all the internet connection and local network configurations in Network and Sharing Center. You can see information about the TCP/IP settings, DNS servers, wireless Internet connections and firewall settings here.The Network and Sharing Center is built into the windows vista control panel for easy access. You can also set your home group and change your internet setting through network configurations in Microsoft Vista.

Get along with the steps below for setting up the network on your own. If you find the steps to be much technical for you to handle, Get Microsoft Product Support With Microsoft-Certified Professionals

Steps to change Network and Sharing Settings

Step1: Click "Start," >"Control Panel”. Then click “Network and Internet”.

Step2: Select "Network and Sharing Center" to set local network configuration for your computer's access and the Internet and to enable access to your computer from other computers within your selected network.

Step3: Select "Set up a new connection or network" to set configuration of Internet connections including wireless, LAN, dial-up, VPN and more.

Step4: Select "Connect to a network" to establish a connection with a previously configured Internet connection. Then select "Choose homegroup and sharing options" to share files or printers or connect to computers within your homegroup that share files or printer.

Step5: Select "Troubleshoot problems" to launch the Windows Internet connection troubleshooting wizard. This application guides you through diagnosing connection issues.

Steps to change Home Group Settings

Step1: Click "Start," "Control Panel." Then click “Network and Internet”

Step2: Select "Homegroup" to configure file and printer sharing across computers within your home or office. And  Select "Change Advanced Sharing Settings" to enable file sharing for select directories and printer sharing across your home network.

Steps to change Internet Settings
Step1: Click "Start," "Control Panel." Then Click "Network and Internet."

Step2: Select "Internet" options to change your Internet connection settings. From Internet Properties menu, you can manage your Internet Explorer program by defaults (including setting the homepage and search providers), set Internet security and privacy levels, manage proxy connections and adjust advanced Internet Explorer settings. Changing options in this dialog applies only to Internet Explorer and not to other browsers that you might use.

Note : Do not get in any shot of computer problem if you are not confident performing the steps detailed above. You can reach online technical support service desk of V tech-squad at their Toll Free No +1-877-452-9201.
Read More
Posted in windows vista fix, windows vista help, windows vista problems, windows vista support | No comments
Newer Posts Older Posts Home
Subscribe to: Posts (Atom)

Popular Posts

  • What to do when Microsoft Windows 7 keeps restarting itself
    When a computer keeps rebooting itself, it can happen due to a wide range of problems, like -incompatible software such as Firewall and Anti...
  • How to Fix a Printer Spooler Error
    The print spooler service controls your print job queue. It acts as an interface between your computer and the printer to send this data to ...
  • How to Register DLL Files in Microsoft Windows XP?
    A DLL (Dynamic Link Library) is a grouping of files that include both data and executable codes that are able to be used by one or more prog...
  • How to Use HP Hardware Diagnostic Tool
    HP Diagnostic Tools are designed to automatically diagnose and resolve many hardware problems. These tools include the  "HP Scan Diagno...
  • How to Connect a Dell Printer to a Wireless System
    Wireless network is the best option to share your resources on multiple computers in your home. With a wireless network in place, you can sh...
  • Windows Phone 8 mobile expected to launch with windows PC operating system
    Windows 7 has done exceptionally well since its release, Microsoft has been constantly working to make the next version of Windows a bett...
  • Top 10 problems with HP printers and solutions
    HP manufactures a wide range of printers, from inexpensive ink jet models for home users through laser printers and large-format units found...
  • How to find Network Settings in Windows Vista
    Microsoft Windows Vista control all the internet connection and local network configurations in Network and Sharing Center. You can see info...
  • How to Install an HP Photosmart Printer
    HP Photosmart printers and all-in-ones to create laser-quality documents, lab-quality photos, and projects at home. HP Photosmart printers a...
  • How to Scan Windows and Fix Errors
    Microsoft’s Windows 7 operating systems include a built-in utility that allows you to scan your computer and fix file system errors automati...

Categories

  • access denied to printer
  • backup registry in windows 7
  • backup windows 7
  • backup windows registry
  • blue screen error
  • blue screen of death
  • blue screen of death fix
  • common Microsoft Outlook problems
  • connect to printer wireless
  • Create a Signature in Outlook 2010
  • create virtual drive
  • creating a digital signature
  • creating virtual drive
  • dell error code 0141
  • dell help
  • dell printers troubleshooting
  • dell support
  • dell system restore
  • dell technical support
  • dell wireless printer
  • dll files windows xp
  • download printer drivers
  • error 1303 windows 7
  • error code 1303
  • fix blue screen
  • fix blue screen of death
  • fix dell laptop
  • fix genuine windows
  • fix hp printer problems
  • fix spooler error
  • fix wga
  • fix windows 7
  • fix windows 7 wga
  • fix windows errors
  • fix windows genuine advantage
  • fix windows start up
  • fix windows start up error
  • fixing blue screen of death
  • format windows XP
  • hardware diagnostics tool
  • how to backup registry windows 7
  • how to fix access denied error
  • how to fix dll file
  • how to fix hp printer
  • how to fix sound on computer
  • how to make vista faster
  • how to set up dell wireless printer
  • hp diagnostic tools
  • hp hardware diagnostic tool
  • i can t print to my wireless printer
  • inspiron 1545 problems
  • install hp photosmart printer
  • install hp printer
  • iPad 2 Rival
  • make vista faster
  • Microsoft Outlook problems
  • microsoft windows 7 help
  • network printer
  • printer cartridges
  • printer problems hp
  • printer sharing windows 7
  • printer spooler error
  • printer support
  • recover deleted file windows xp
  • recover password of .pst file
  • Recover PST File Password in Microsoft Outlook
  • recovering deleted files
  • register dll xp
  • registry backup windows 7
  • replace printer cartridges
  • reset password windows 7
  • Scan Windows and Fix Errors
  • share printer windows xp and 7
  • system requirements windows 7
  • the blue screen of death
  • troubleshoot no sound
  • update printer driver
  • virtual drive
  • window 7 upgrade
  • Windows 7 based iPad 2 Rival
  • windows 7 blue screen
  • windows 7 error
  • windows 7 error 1303
  • windows 7 help
  • windows 7 problems
  • windows 7 recovery
  • windows 7 safe mode password reset
  • windows 7 sound problems
  • windows 7 support
  • windows 7 system requirements
  • windows 7 upgrade advisor
  • windows 7 windows genuine advantage
  • Windows 8 boot fast
  • Windows 8 boot time
  • Windows 8 boots super fast
  • windows genuine advantage
  • windows operating system
  • windows start up
  • windows startup error
  • windows support
  • windows upgrade advisor
  • windows vista fix
  • windows vista help
  • windows vista problems
  • windows vista support
  • windows wga
  • windows xp fix
  • windows xp help
  • windows xp problems
  • windows xp support

Blog Archive

  • ▼  2012 (34)
    • ▼  August (3)
      • I Can't Print to a Network Printer, What Do I Do?
      • How to Update Printer Drivers Manually
      • How to Fix 'Access Denied' Error when Printing to ...
    • ►  July (3)
      • How to Replace Printer Cartridges
      • How to Use HP Hardware Diagnostic Tool
      • How to Make Windows Vista Faster
    • ►  June (4)
      • How to Format Windows XP
      • How to Register DLL Files in Microsoft Windows XP?
      • What to do when Microsoft Windows 7 keeps restarti...
      • How to Reset a Password in Windows 7 Safe Mode
    • ►  May (3)
      • How to Connect a Dell Printer to a Wireless System
      • How to Scan Windows and Fix Errors
      • How to Fix a Printer Spooler Error
    • ►  April (7)
      • How to Create a Virtual Drive
      • How to Perform a Dell System Restore
      • How to Share Printers on Windows XP and Windows 7
      • How to Fix Error 1303 on a Dell Laptop
      • Top 10 problems with HP printers and solutions
      • How to Resolve Dell Error Code 0141
      • How to Fix HP Printer Errors
    • ►  March (8)
      • How to fix Common dell inspiron 1545 problems and ...
      • How to Install an HP Photosmart Printer
      • How to Troubleshoot No Sound From Computer Speakers
      • How to Fix a Dell Laptop
      • How to Troubleshoot Your Dell Printer
      • How to Troubleshoot Grinding on the Dell 1720DN Pr...
      • How to Recover Deleted Files from Window XP
      • How to Fix Windows Xp Slow Startup
    • ►  February (5)
      • How to find Network Settings in Windows Vista
    • ►  January (1)
  • ►  2011 (9)
    • ►  December (2)
    • ►  November (3)
    • ►  September (2)
    • ►  August (2)
Powered by Blogger.

About Me

Unknown
View my complete profile