Formatting a hard drive erases all data on the drive, so it is important to back up all your wanted data to an external hard drive before proceeding. If you want to format Windows XP, then you need Windows XP installation CD. Follow the given steps to format Windows XP.
If you want to fix slow start up in Windows XP then follow this blog- How to Fix Windows Xp Slow Startup
Step1: First you must put your Windows XP CD in the drive.
Step2: Then restart your computer. And press Delete key repeatedly on the keyboard.
Step3: When it says press any key to boot from cd, Press any key on the keyboard.

Step4: Go into the BIOS settings of your PC, Check your motherboard information and enable “Boot from CD” option from your BIOS.
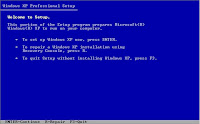
Step5: After you enter the setup, the CD will load up a blue screen and will start loading operating system files (it will take few minutes). When it finishes, it will list a few options, click the option “Press ENTER to set up Windows XP now”.
Step6: Press F8 to accept Microsoft license agreement.
Step7: Press Enter to start the Windows installation.
Step8: Delete old partition and format. At this point you need to select the partition where you prefer to install Windows XP.
Step9: Create installation partition. Select un-partitioned space and press “C”.
Step10: Select format using NTFS (Quick) and hit Enter.
Step11: Setup will start and auto-format the “C:” partition, and start with Windows XP installation. It will reboot the setup and Copy all the files needed for Windows setup.
Step12: wait for few minutes and do not remove the Windows XP CD until the computer has started up with a new desktop and icons.
See also: What to Do When Microsoft Windows XP Won't Shut Down
How to Scan Windows and Fix Errors
If you want to fix slow start up in Windows XP then follow this blog- How to Fix Windows Xp Slow Startup
Step1: First you must put your Windows XP CD in the drive.
Step2: Then restart your computer. And press Delete key repeatedly on the keyboard.
Step3: When it says press any key to boot from cd, Press any key on the keyboard.

Step4: Go into the BIOS settings of your PC, Check your motherboard information and enable “Boot from CD” option from your BIOS.
Step5: After you enter the setup, the CD will load up a blue screen and will start loading operating system files (it will take few minutes). When it finishes, it will list a few options, click the option “Press ENTER to set up Windows XP now”.
Step6: Press F8 to accept Microsoft license agreement.
Step7: Press Enter to start the Windows installation.
Step8: Delete old partition and format. At this point you need to select the partition where you prefer to install Windows XP.
Step9: Create installation partition. Select un-partitioned space and press “C”.
Step10: Select format using NTFS (Quick) and hit Enter.
Step11: Setup will start and auto-format the “C:” partition, and start with Windows XP installation. It will reboot the setup and Copy all the files needed for Windows setup.
Step12: wait for few minutes and do not remove the Windows XP CD until the computer has started up with a new desktop and icons.
See also: What to Do When Microsoft Windows XP Won't Shut Down
How to Scan Windows and Fix Errors


0 comments:
Post a Comment